
Step-by-Step Guide: Installing Under-Cabinet Lighting for Modern Kitchens
Introduction: Brighten Up Your Kitchen the Smart Way
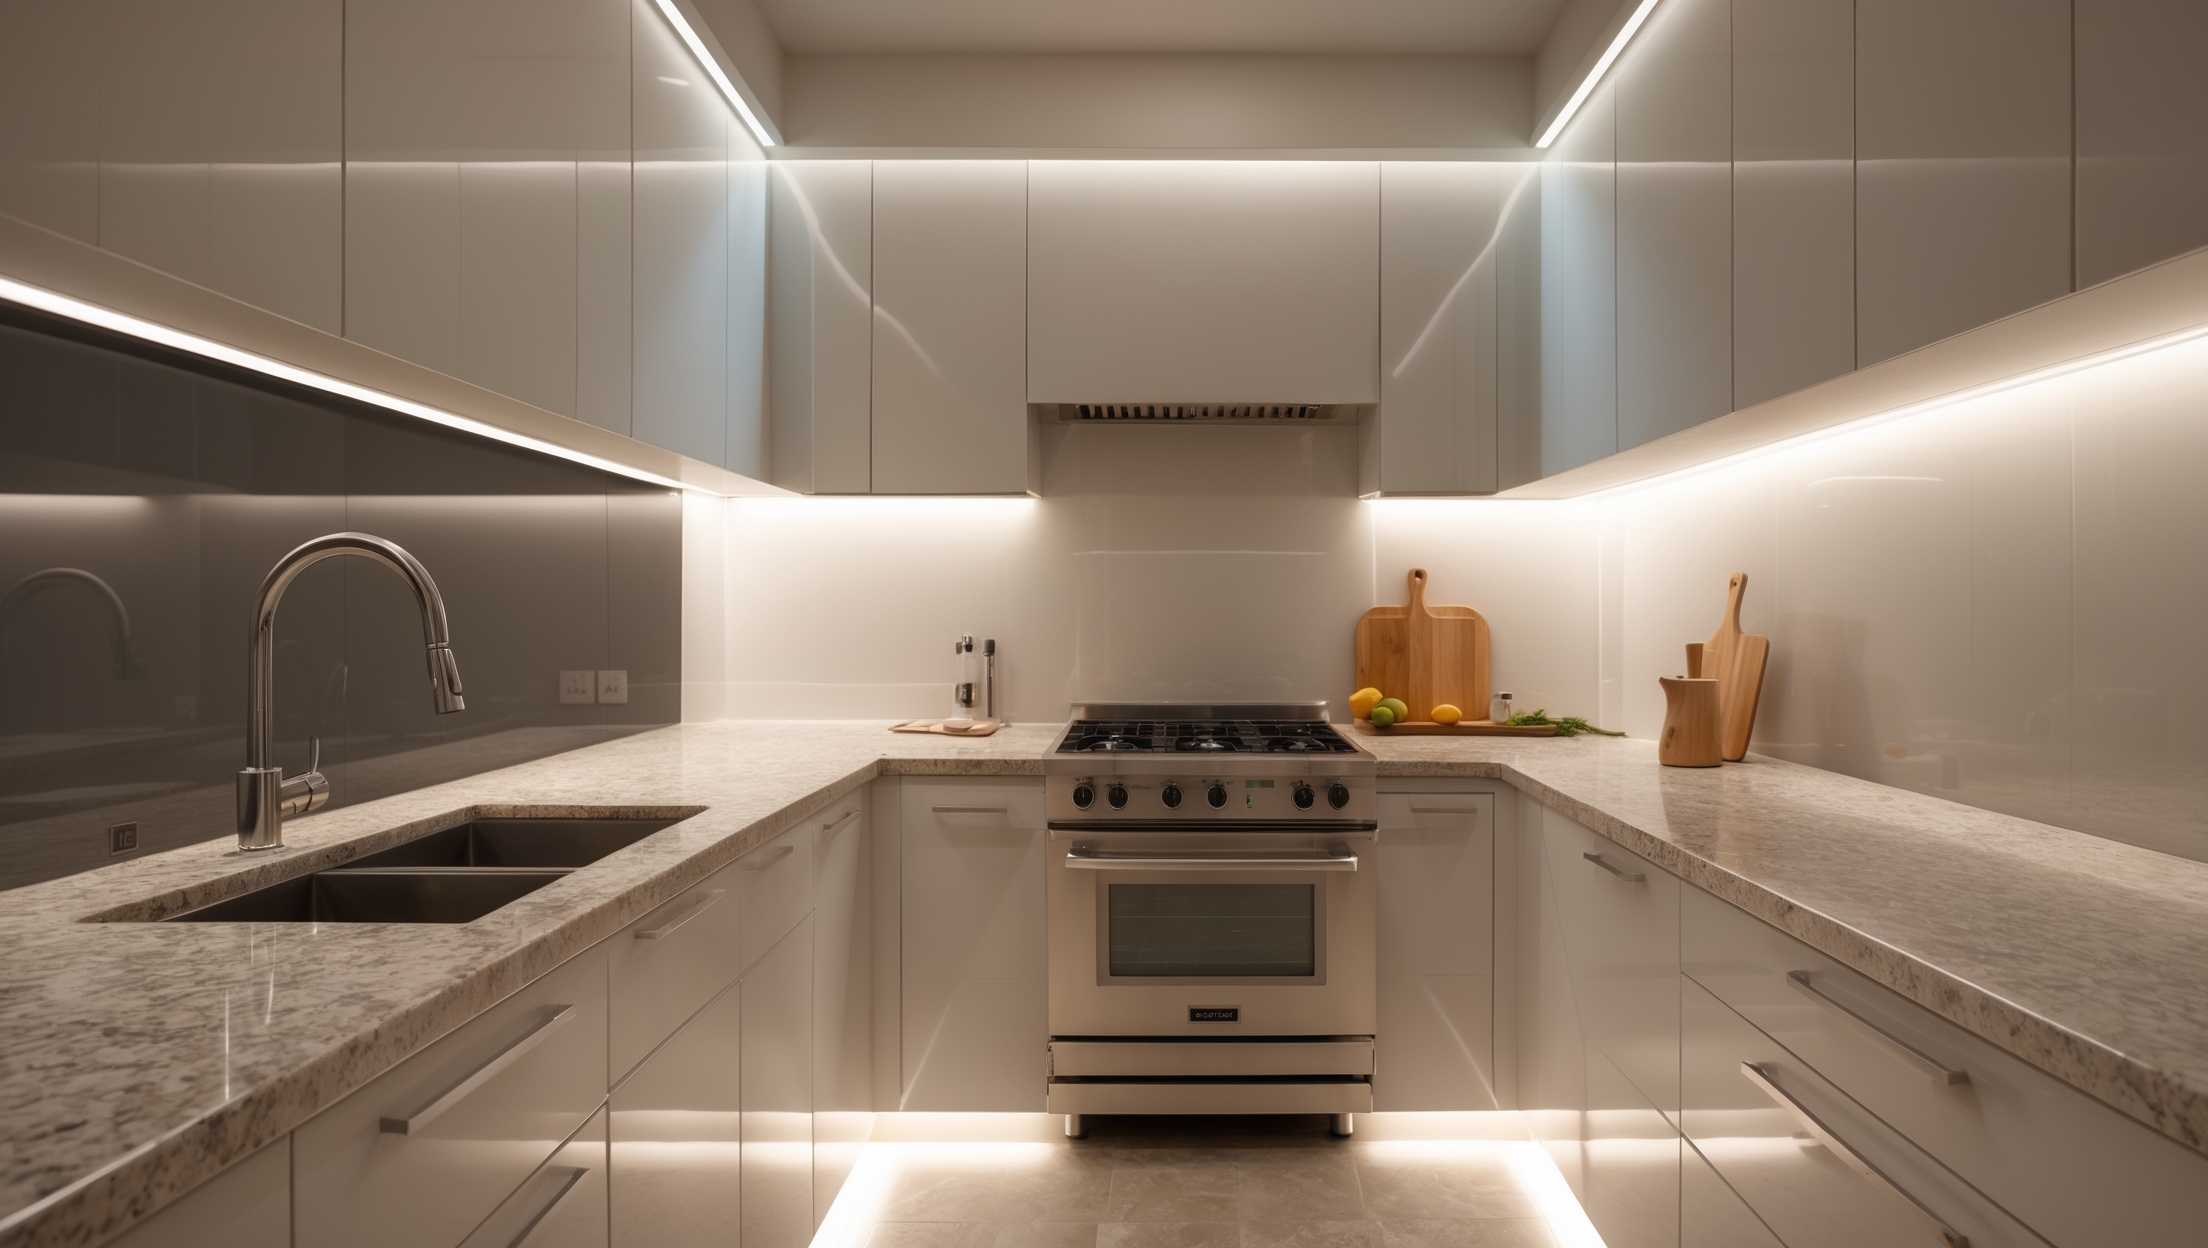
Under-cabinet lighting is no longer just an upscale luxury—it’s become a practical, accessible upgrade for any modern kitchen. By illuminating your countertops and workspaces, under-cabinet lights improve visibility for food prep, add ambiance, and even increase your home’s value. With advances in LED technology, under-cabinet lighting solutions are more energy-efficient, longer-lasting, and easier to install than ever before. Yet, many homeowners are hesitant to tackle this project, worrying about wiring, compatibility, or making costly mistakes. The good news? With the right tools, a clear plan, and expert guidance, even DIY beginners can achieve professional-looking results. In this comprehensive guide, we’ll walk you through every step of installing under-cabinet lighting, from choosing the right system and budgeting to safety tips, avoiding common pitfalls, and ensuring your installation meets code. Whether you’re aiming for a sleek, seamless look or a functional boost to your kitchen’s workspace, you’ll find everything you need to succeed below.
Understanding Your Under-Cabinet Lighting Options
Types of Under-Cabinet Lighting
- LED Light Bars: Slim, linear fixtures that deliver even, bright light across the entire length of your cabinets. Ideal for modern aesthetics and energy efficiency.
- LED Puck Lights: Small, round lights that create focused pools of light. Great for accent lighting or highlighting specific areas.
- LED Tape/Strip Lights: Flexible adhesive strips with closely spaced LEDs. Perfect for custom lengths and tight spaces, offering a continuous glow.
- Fluorescent Fixtures: Older technology, less common today due to bulkiness and lower efficiency, but still found in some homes.
Hardwired vs. Plug-in Systems
- Hardwired: Permanently connected to your home’s electrical system, often controlled by a wall switch. Offers a seamless look but requires electrical know-how or professional help.
- Plug-in: Simpler to install—just plug into an existing outlet, often with built-in switches. Ideal for renters or those wanting a quick upgrade.
Budgeting and Cost Breakdown
Upfront Costs
- LED Light Bars: $20–$70 per fixture (mid-range, popular choice)
- LED Puck Lights: $25–$40 for a 3-pack
- LED Tape Strips: $15–$40 for 16 feet
- Power Supplies/Transformers: $15–$50
- Dimmers/Switches: $10–$30
- Wiring, Connectors, and Mounting Hardware: $15–$50 (depending on kitchen size)
Professional vs. DIY Installation
- DIY: Expect to spend $60–$300, depending on your system and kitchen size.
- Professional Installation: $250–$900+, especially for hardwired systems requiring new circuits or significant wiring.
Hidden and Ongoing Costs
- Permits: Sometimes required for hardwired installations. Fees range from $25–$100.
- Energy Consumption: Minimal for LEDs—running 10 feet of LED tape for 4 hours daily costs less than $2/month in most locations.
Essential Tools and Materials
- Tape measure
- Pencil and notepad
- Drill and small drill bits
- Screwdriver set
- Wire strippers (for hardwired systems)
- Voltage tester (for safety)
- Double-sided mounting tape or mounting clips (for tape lights)
- Extension cord (for plug-in systems)
- Cable concealers or raceways for a neat finish
Planning Your Installation: Key Considerations
Measuring and Layout
Start by measuring the length of your cabinets. Map out where you want to place your lights—continuous runs for tape/bar lights, or spaced intervals for puck lights. Consider the location of outlets if using plug-in systems or the wall switch if hardwiring. Sketch a quick diagram to visualize placement, power source, and cable runs.
Lighting Temperature and Brightness
- Color Temperature: For kitchens, 2700K–4000K (warm to cool white) is ideal. Warmer tones are cozy; cooler tones are crisp and functional.
- Lumens: Aim for 200–500 lumens per foot for task lighting.
Electrical Safety and Code Compliance
- For hardwired installations, local codes may require that connections be made inside junction boxes.
- Never overload an existing circuit. Use a voltage tester to ensure power is off before beginning any work.
- If unsure, consult a licensed electrician—especially if new wiring or circuit modifications are needed.
Step-by-Step Installation Guide
Step 1: Gather Materials and Prep the Area
- Clear countertops and remove items from beneath cabinets.
- Wipe down the underside of cabinets for better adhesion and visibility.
- Lay out your tools, lighting, and all components to ensure nothing is missing.
Step 2: Mark and Test Placement
- Hold light bars, pucks, or tape strips in place to confirm desired coverage and look.
- Mark mounting points lightly with a pencil.
- Temporarily connect lighting to power to preview effect and adjust as needed.
Step 3: Mount the Fixtures
- For light bars and pucks, pre-drill pilot holes and use provided screws or mounting clips.
- For tape lights, peel adhesive backing and press firmly. Supplement with mounting clips if included for extra security.
- Ensure all fixtures are straight and evenly spaced.
Step 4: Route and Conceal Wiring
- Use cable concealers or raceways to hide wires along cabinet undersides and backsplashes.
- Drill small holes between cabinets if needed to pass power cables discreetly.
- Secure excess cable with clips or ties—never let wires dangle loosely.
Step 5: Connect to Power
- For plug-in systems, plug into a nearby outlet and secure the cord out of the way.
- For hardwired systems:
- Turn off power at the breaker panel.
- Connect wires inside a junction box per manufacturer instructions. Match black (hot), white (neutral), and green/bare (ground) wires.
- Secure with wire nuts and electrical tape.
- Use a voltage tester to confirm safe connections before mounting covers.
Step 6: Install Dimmer or Switch (Optional)
- Many systems support inline dimmers or smart switches for adjustable brightness and energy savings.
- Follow manufacturer instructions for safe installation.
Step 7: Test and Finalize
- Restore power and turn on the lights. Check for flickering, dead spots, or uneven brightness.
- Adjust or reposition fixtures if needed.
- Replace any items beneath the cabinets.
Common Mistakes to Avoid
- Overlooking Power Accessibility: Plan for easy access to outlets or wiring before buying your system.
- Poor Cable Management: Exposed cords look unattractive and can be hazardous. Invest in cable concealers.
- Skipping the Test Fit: Always preview lighting placement before final installation to avoid shadows or glare.
- Choosing the Wrong Color Temperature: Avoid overly cool or warm lights that clash with your kitchen’s style.
- Ignoring Safety Precautions: Always turn off power at the breaker for hardwired installations, and confirm with a voltage tester.
- Not Following Local Codes: Especially for hardwired systems, improper connections can lead to safety hazards and inspection failures.
Maintenance and Troubleshooting Tips
- Cleaning: Wipe fixtures with a soft, dry cloth. Avoid moisture, which can damage electrical components.
- Replacing LEDs: Most LEDs last 10,000+ hours, but if a strip or puck fails, replacements are usually simple plug-and-play or peel-and-stick.
- Addressing Flicker or Dimming: Check connections, power supply, and ensure no overloaded circuits.
- Upgrading Controls: Many systems allow retrofitting with smart switches or dimmers for enhanced control.
Safety Checklist
- Always turn off power at the breaker before starting any electrical work.
- Use a voltage tester to confirm circuits are de-energized.
- Follow all manufacturer and local code requirements for wiring and installation.
- Never run cords across sinks or hot surfaces.
- Secure all fixtures and cables to prevent falls or damage.
- Test lights thoroughly before completing the project.
Conclusion: Transform Your Kitchen with Confidence
Under-cabinet lighting is one of the most rewarding kitchen upgrades, offering both instant visual impact and long-term functional benefits. Whether you’re aiming for a high-end remodel feel or simply want to make meal prep safer and easier, the right lighting can make a world of difference. By understanding the types of systems available, creating a realistic budget, gathering the right tools, and following a careful step-by-step process, you can achieve professional results—often in a single afternoon.
Remember, attention to detail pays off. Take time to plan your layout, manage cables, and select the ideal color temperature for your space. Don’t cut corners on safety—when in doubt, consult a licensed electrician, especially if your installation requires new wiring or circuit modifications. With LEDs, ongoing maintenance is minimal, and most systems can be upgraded or expanded as your needs change.
Most importantly, enjoy the process and the transformation you’ve created. Under-cabinet lighting isn’t just a finishing touch; it’s an upgrade that enhances your kitchen’s beauty, usability, and value for years to come. Step back, flip the switch, and savor the glow of a job well done!
I’m interested in installing under-cabinet LED light bars for a modern look, like you mentioned, but I’m not sure how complicated the hardwiring process is for someone with very basic electrical skills. Is it realistic to try this myself, or should I plan to hire an electrician?
Hardwiring under-cabinet LED light bars can be a bit challenging if you only have basic electrical skills, especially since it involves connecting to your home’s wiring and installing a switch. If you’re not comfortable working with electricity or reading wiring diagrams, it’s safer to hire an electrician. However, there are also plug-in LED light bars that are easy to install yourself and still give a modern look.
When it comes to budgeting for these lighting upgrades, do you have any advice on how to estimate the total cost, including installation and materials? I want to avoid surprises, especially since prices can vary between LED light bars and strip lights.
To estimate your total cost, start by measuring the length of cabinets you want to light—this helps you calculate how many light bars or strips you’ll need. Research prices for both types, as LED strip lights are usually less expensive than light bars. Factor in the cost of power supplies, connectors, and dimmers if needed. For installation, get at least two local quotes from electricians to compare labor costs. Add a 10-15% buffer for unexpected expenses or upgrades.
How much should I expect to budget if I go with LED light bars versus puck lights for an average-sized kitchen? I want to get a brighter workspace but keep the costs reasonable, so any guidance on price differences or installation costs would be really helpful.
For an average-sized kitchen, LED light bars typically cost between $30 to $60 per bar, and you’ll likely need 3 to 4 bars, depending on your cabinet length. LED puck lights are usually less expensive per unit—around $20 to $40 for a set of 3 to 6—but you may need more of them to achieve the same brightness and coverage. Light bars generally provide a more even, brighter workspace. Professional installation runs about $100 to $300 regardless of the type, though bar lights are sometimes simpler to install. Overall, expect to budget $150 to $500 total, with bars being slightly more upfront but often delivering better illumination for kitchens.
I noticed the article mentions both hardwired and plug-in systems for under-cabinet lighting. If my kitchen only has an outlet on one end of the cabinets, is a plug-in system still practical, or would I run into issues with uneven lighting or messy cords?
A plug-in system can work if your outlet is at one end, but you may need to run cords along or behind the cabinets to reach all areas, which can sometimes look messy if not managed well. You can use cord covers or raceways to keep things tidy. For the most seamless look and even lighting, a hardwired system is often preferred, but a plug-in setup is still practical if you plan the cord management carefully.
I noticed the guide mentions hardwired systems offering a seamless look but needing some electrical knowledge. For someone with basic DIY experience but no electrical background, how difficult is it to safely install a hardwired under-cabinet setup, and are there specific safety steps or codes to be aware of in the US?
Installing a hardwired under-cabinet lighting system can be challenging if you have no electrical background, as it involves working with your home’s electrical wiring and possibly installing new circuits or switches. In the US, key safety steps include shutting off power at the breaker, using a voltage tester to confirm wires are not live, and following the National Electrical Code (NEC). For major wiring changes or if you’re unsure, it’s best to consult or hire a licensed electrician to ensure the installation is both safe and up to code.