
Replacing Old Insulation: Cost Breakdown, Permit Insights, and Step-by-Step Guide
Introduction: Why Replacing Old Insulation Matters
Insulation is the unsung hero of comfortable, energy-efficient homes. But what happens when your insulation is past its prime? Whether you’re dealing with sagging batts, rodent damage, moisture problems, or simply outdated materials, ignoring old insulation can lead to higher energy bills, poor indoor air quality, and even structural issues. Replacing old insulation isn’t just a matter of comfort—it’s a crucial investment in your home’s health and safety. In this comprehensive guide, we’ll break down the real costs of insulation replacement, what permits or compliance considerations you need to know, and provide a practical, step-by-step method for tackling the project. If you’ve never replaced insulation before, don’t worry: we’ll cover common homeowner questions, address typical mistakes, and offer professional insights to help you avoid costly errors. Let’s empower you to make informed decisions and achieve a warmer, healthier home.
Recognizing When It’s Time to Replace Insulation
Common Warning Signs
- Unexplained Drafts: Persistent drafts or cold spots, especially in winter, may point to degraded insulation.
- Spike in Energy Bills: A sudden or gradual increase in heating and cooling costs often signals ineffective insulation.
- Visible Damage: Wet, moldy, compressed, or pest-infested insulation loses effectiveness and can cause health issues.
- Old Age: Most insulation materials last 15–30 years. If yours is older, it may be time to upgrade.
Material-Specific Lifespan Overview
- Fiberglass Batts: 15–30 years (longer if dry and undisturbed)
- Cellulose: 20–30 years, but susceptible to moisture and settling
- Spray Foam: 30+ years (but can shrink or degrade with UV exposure or moisture)
- Mineral Wool: 30+ years (very durable, but check for moisture)
Cost Breakdown: What to Expect
Material Costs
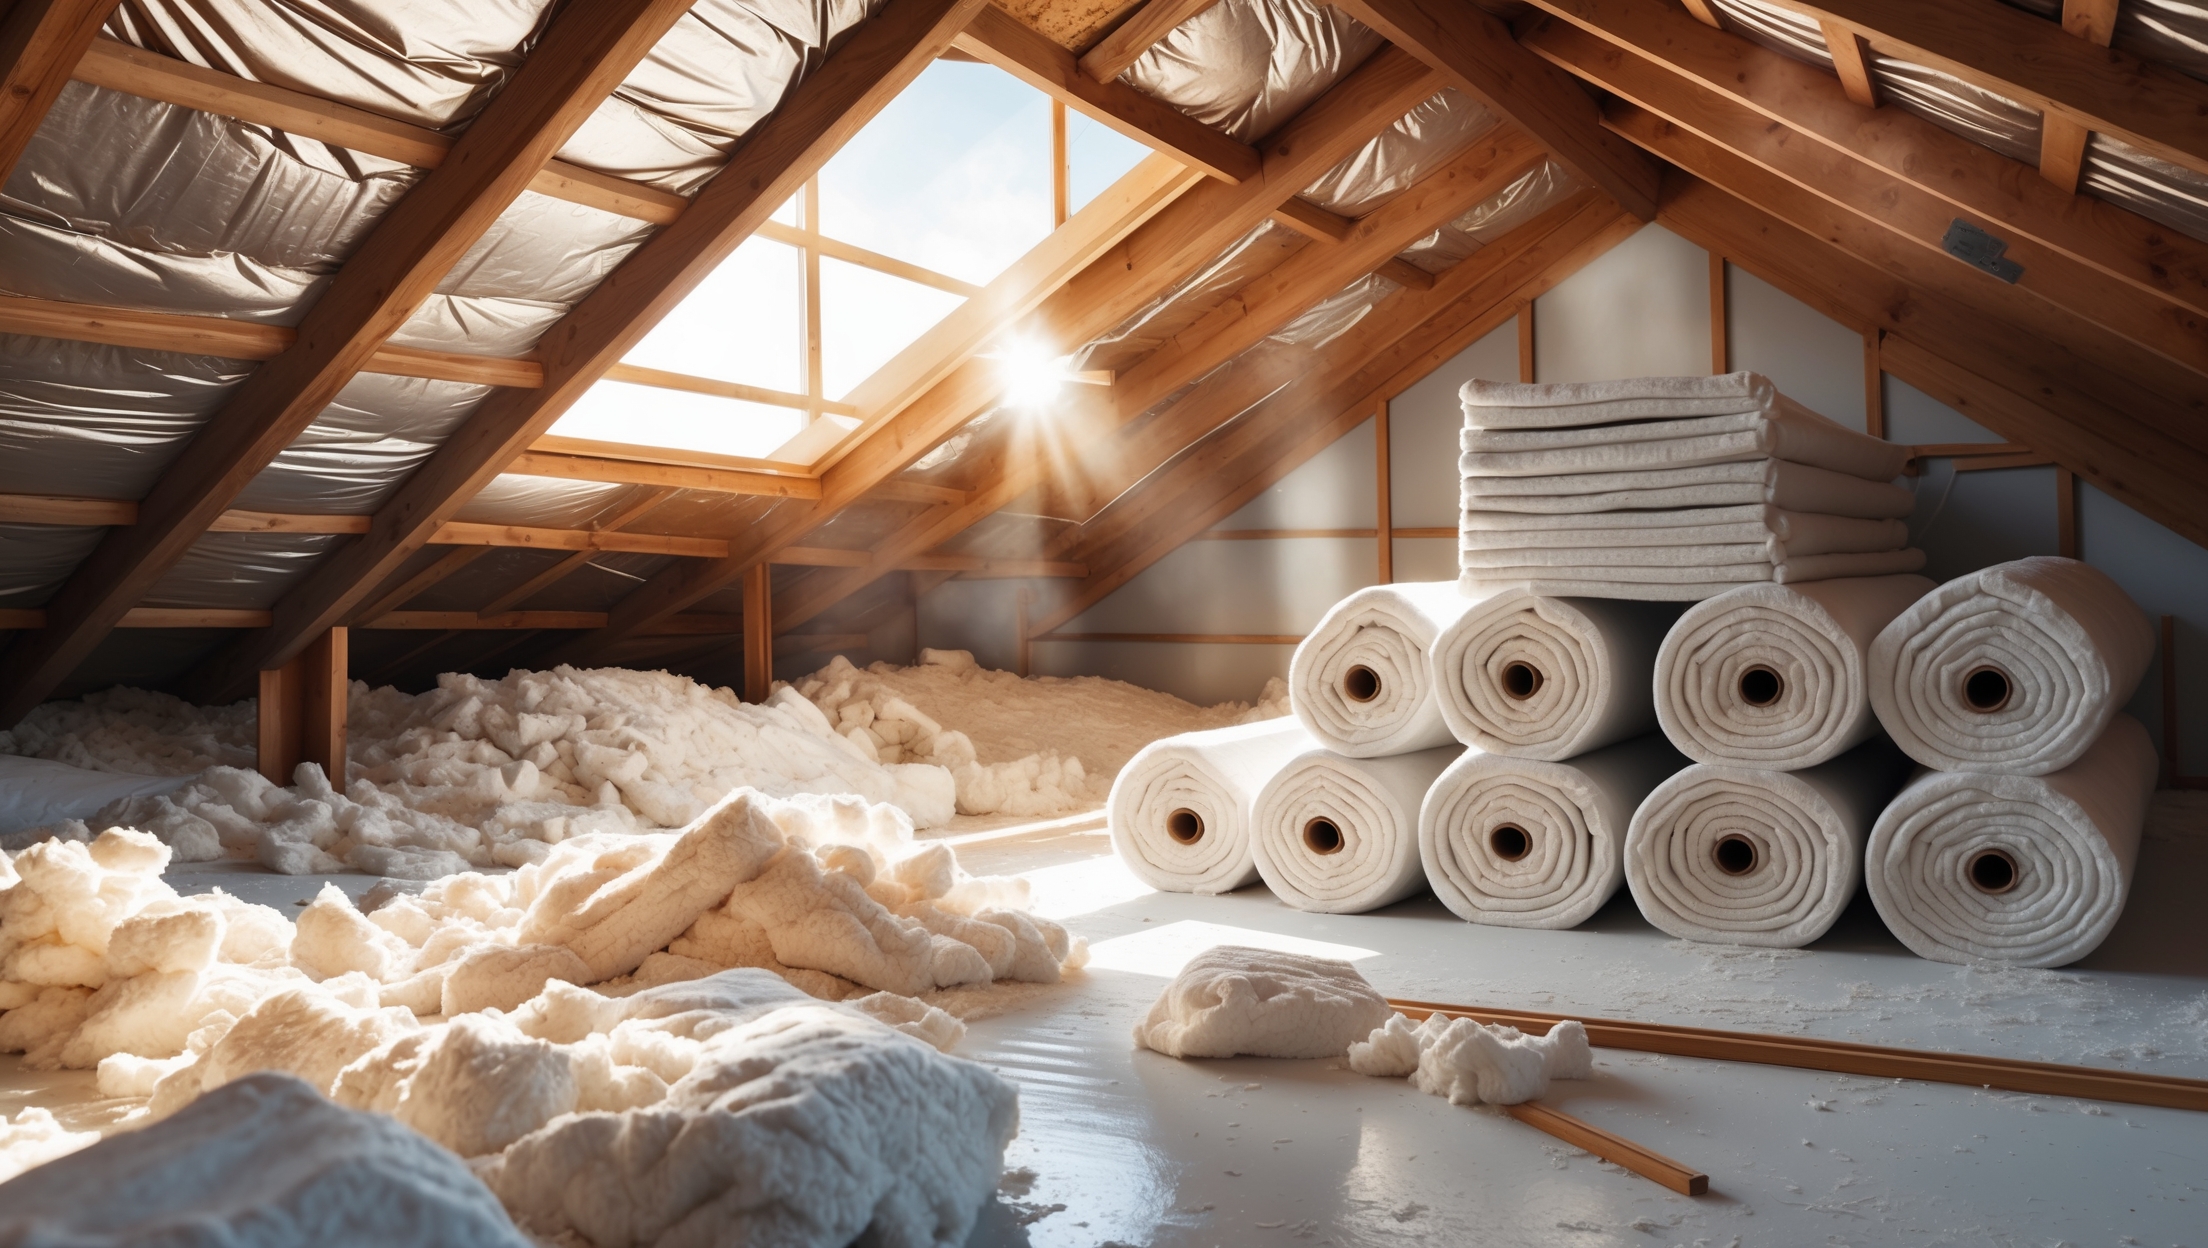
- Fiberglass Batts/Rolls: $0.40–$1.00 per sq. ft.
- Blown-in Cellulose or Fiberglass: $1.00–$2.00 per sq. ft. (installed)
- Spray Foam: $1.50–$3.50 per sq. ft. (installed; DIY kits available but challenging for large areas)
- Mineral Wool: $1.00–$1.50 per sq. ft.
Labor Costs
If you hire a pro, labor typically runs $0.50–$1.25 per sq. ft. for removal and $1.00–$2.00 per sq. ft. for installation. DIYers save on labor but should budget for tool rental and disposal fees.
Disposal Fees
Old insulation may contain dust, mold, or even asbestos (in pre-1980s homes). Dumpster rental and hazardous material disposal can cost $200–$1,000, depending on material and volume.
Additional Expenses
- Protective Equipment: $50–$200 for masks, coveralls, gloves, and goggles
- Air Sealing Materials: $30–$150 for spray foam, caulk, and weatherstripping
- Permits (if required): $50–$300 (more on this below)
- Moisture or Pest Remediation: Variable; if needed, can add $500–$3,000
Sample Budget: 1,000 Sq. Ft. Attic (DIY Fiberglass)
- Materials: $600–$1,000
- Disposal: $300
- Protective gear: $100
- Air sealing: $50
- Total: $1,050–$1,450
Compliance and Permit Considerations
When Is a Permit Required?
Many municipalities do not require a permit for simple insulation replacement. However, permits are often required if:
- You’re removing or disturbing existing insulation that may contain asbestos (pre-1980s homes)
- You’re increasing insulation thickness (changing R-value beyond code minimums)
- The work is part of a larger renovation involving structural changes or electrical rewiring
Building Code Compliance
- Check your local building department’s website or call to confirm insulation R-value requirements for attics, walls, and floors.
- Comply with minimum air sealing and vapor barrier standards, especially in cold or humid climates.
- Document the new insulation’s type, R-value, and installation date for future reference and resale.
Pest and Hazardous Material Remediation
If existing insulation is contaminated with mold, vermin, or hazardous materials, some jurisdictions require certified removal and documentation. Never attempt to remove suspected asbestos yourself—contact a licensed abatement contractor.
Choosing the Right Insulation for Your Home
Evaluating Your Needs
- Climate: Colder climates benefit from higher R-value per inch (e.g., spray foam or mineral wool). Hot climates may prioritize radiant barriers.
- Budget: Fiberglass is the most affordable; spray foam is more expensive but offers higher performance.
- DIY Skill Level: Batts and rolls are the easiest for DIYers. Blown-in and spray foam are best handled by pros for large areas.
- Allergies/Sensitivity: Mineral wool is noncombustible and resists mold; cellulose is eco-friendly but dusty.
Recommended R-Values (by Zone)
- Zone 1–2 (South): R-30 to R-49 (attic)
- Zone 3–4 (Mid): R-38 to R-60 (attic)
- Zone 5–7 (North): R-49 to R-60 (attic)
Walls and floors will have different requirements; check your local code.
Step-by-Step Guide to Safe Insulation Replacement
1. Prepare the Area
- Clear the attic or work area of stored items.
- Lay down plastic sheeting to protect floors and catch debris.
- Set up adequate lighting and ensure safe access (sturdy ladder, walk boards).
2. Safety First
- Wear disposable coveralls, gloves, goggles, and a P100 respirator mask.
- Shut off HVAC systems to prevent dust spread.
- Ventilate the area with fans or open windows where possible.
3. Remove Old Insulation
- For batts/rolls: Carefully roll up and bag old insulation. Avoid compressing to reduce dust release.
- For blown-in: Use a shop vacuum with HEPA filter or rent a commercial insulation removal vacuum.
- Bag all debris in heavy-duty contractor bags. Double-bag if mold or pest evidence is present.
- Dispose of materials as per local regulations—do NOT burn insulation.
4. Inspect for Issues
- Check for water stains, mold, or pest damage to joists or sheathing.
- Repair leaks or damage before proceeding. Mold should be remediated professionally if widespread.
5. Air Sealing and Prep
- Seal gaps, cracks, and penetrations (around pipes, wires, vents) with spray foam or caulk.
- Install or repair vapor barriers if required in your climate zone.
- Ensure soffit vents are clear to preserve attic ventilation.
6. Install New Insulation
- For batts/rolls: Lay insulation snugly between joists, avoiding compression. Stagger layers for higher R-value if needed.
- For blown-in: Rent a blower and follow manufacturer’s depth guidelines. Use rulers or depth markers to confirm coverage.
- Spray foam: Hire a pro unless you have experience; DIY kits are best for small areas.
- Do not block eaves or vents; use baffles as needed to maintain airflow.
7. Clean Up and Final Checks
- Bag and remove all debris. Safely dispose of protective gear.
- Document the type and thickness of new insulation for future reference.
- Restore stored items only after confirming area is clean and dry.
Common Mistakes and How to Avoid Them
- Skipping Air Sealing: Insulation is less effective if air leaks are unaddressed. Always seal before insulating.
- Blocking Ventilation: Never cover soffit or ridge vents—this can cause moisture buildup and mold.
- Improper Vapor Barrier Placement: In cold climates, the vapor barrier goes on the warm side; in hot climates, consult local code.
- Using Wrong R-Value: Under-insulating wastes energy; over-insulating can cause moisture issues. Match local code and climate.
- Ignoring Safety: Skipping PPE or improper disposal can cause health issues. When in doubt, consult a pro.
Maintenance Tips for Maximum Longevity
- Check attic insulation annually for signs of moisture, pests, or settling.
- Maintain roof and plumbing to prevent leaks above insulation.
- Avoid compressing insulation with stored items.
- Consider upgrading if energy bills rise or comfort drops over time.
Conclusion: Building a Better, Safer Home
Replacing old insulation is one of the most effective ways to improve your home’s comfort, efficiency, and long-term value. By understanding the cost factors, permit and compliance requirements, and the best materials for your specific needs, you can avoid common pitfalls and make informed decisions. A step-by-step approach—prioritizing safety, thoroughness, and proper disposal—will ensure your new insulation performs at its best for decades. Don’t underestimate the importance of air sealing and moisture control; these steps are just as crucial as the insulation itself. While the upfront investment can be significant, the long-term savings on energy bills and reduced wear-and-tear on your HVAC system make it a wise choice for any homeowner. Whether you choose to DIY or hire a professional, replacing old insulation is a project that pays dividends in comfort, health, and peace of mind. Stay proactive, conduct regular maintenance checks, and your home will reward you with warmth and efficiency all year round.
If you find visible mold or rodent damage while pulling out old fiberglass batts, is it safe for a homeowner to handle the removal themselves, or should we always contact a remediation professional before continuing with the insulation project?
If you discover visible mold or signs of rodent damage while removing old fiberglass insulation, it’s generally safest to pause your project and consult a remediation professional. Mold can pose health risks if disturbed, and rodent droppings may carry harmful pathogens. Professionals can safely assess and address these hazards before you continue with new insulation, ensuring your home remains safe and healthy.
The article mentions that spray foam can shrink or degrade if exposed to moisture or UV. If my attic sometimes gets humid in the summer, is spray foam still a good choice, or should I go with something more moisture-resistant like mineral wool?
If your attic tends to get humid in the summer, mineral wool might be a more reliable option since it is highly resistant to moisture and won’t degrade if exposed to humidity. Spray foam can work well if professionally installed and properly sealed, but any leaks or gaps could allow moisture in, leading to potential issues over time. Mineral wool offers peace of mind in damp conditions without concerns about shrinkage or mold.
When calculating the cost per square foot, does that usually include removal of old insulation, or is that just the price for new materials and installation? Trying to set a realistic budget, so I want to be sure I’m covering all the bases.
Cost per square foot figures often just cover new materials and installation, but they don’t always include the removal of old insulation. Removal is typically an extra charge, since it can involve more labor and disposal fees. When budgeting, ask contractors to clearly separate these costs in their estimates to avoid surprises.
You mentioned that old insulation can lead to poor indoor air quality and even structural issues. If we find visible mold or moisture in our current insulation, do you recommend replacing just the affected sections or should the entire area be redone to prevent future problems?
If you discover visible mold or moisture in your insulation, it’s safest to assess the whole area, not just the visibly affected sections. Mold and moisture can spread beyond what you see. In most cases, it’s recommended to replace all insulation in the affected space to fully address the issue and prevent future problems. Be sure to find and fix any sources of moisture as well, so the problem doesn’t return.
If my home still has the original fiberglass batts from when it was built in the early 90s, should I consider replacing all the insulation at once, or is it okay to do sections over time? Would that impact overall energy efficiency?
If your insulation is still the original from the early 90s, replacing it can make a real difference in comfort and efficiency. You can tackle the project in sections if budget or time is a concern. Just be aware that energy savings will be gradual—rooms with old insulation might still lose heat or cool air until you’ve finished the whole house.
If my current insulation is around 25 years old but doesn’t show obvious signs of damage like moisture or pests, should I still consider replacing it soon because of its age, or is it okay to wait until there are other warning signs?
If your insulation is 25 years old but not showing issues like moisture, pests, or significant settling, it’s generally safe to wait before replacing it. However, insulation performance can naturally decline over time. If you notice rooms are draftier, heating and cooling bills are rising, or your home doesn’t stay comfortable, those are signs it might be time to upgrade even without visible damage.
For someone on a tight budget, are there any specific insulation materials or methods you’d recommend that balance affordability with longevity? For example, is blown-in cellulose more cost-effective than fiberglass batts in the long run?
Blown-in cellulose is generally more affordable upfront and provides good coverage, especially for attics or hard-to-reach spaces. It’s made from recycled materials and can last 20-30 years if kept dry. Fiberglass batts are also budget-friendly and easier for DIY installs, but they may not fit snugly in older homes with irregular framing. For tight budgets, cellulose is often the better long-term value, as long as moisture isn’t an issue.
If my insulation is only about 18 years old but I see some minor moisture spots, should I replace just those sections, or is it better to do a full replacement to prevent health issues down the line? Any advice for deciding the best approach?
If the moisture spots are localized and the rest of your insulation appears dry and intact, you can usually replace just those affected sections. However, check carefully for mold or more widespread moisture damage, as these issues can impact air quality and health. If moisture is extensive or recurring, a full replacement may be safer. Assess the source of moisture, too, to prevent future problems.
When factoring in the cost breakdown you provided, does hiring a professional for spray foam installation generally double the price compared to DIY with fiberglass batts? I’m trying to figure out if the extra investment is worth it.
Hiring a professional for spray foam installation can cost about two to three times more than doing a DIY job with fiberglass batts. While the upfront cost is higher, spray foam offers better insulation, improved air sealing, and longer lifespan. If your budget allows, the extra investment can pay off in energy savings and home comfort over time. It really depends on your priorities and whether you’re comfortable with DIY installation.