
Step-by-Step Guide: Setting Up a Home Workshop for DIY Success
Introduction: Why Every DIYer Needs a Home Workshop
Whether you’re an enthusiastic beginner or a seasoned DIY veteran, having a dedicated home workshop elevates your home improvement projects to a whole new level. A well-organized workshop isn’t just a place for tools—it’s your creative command center, a safe haven for tackling repairs, building furniture, or experimenting with new ideas. Setting up a functional, efficient workshop at home can save you time, money, and frustration in the long run. But many homeowners feel overwhelmed by the idea: Where do you start? What tools are truly essential? How do you maximize a small space? How can you make it safe and compliant? This comprehensive step-by-step guide walks you through every critical decision, from choosing the right location and layout to selecting tools, implementing safety measures, and ensuring smart storage. Whether you’re transforming a spare room, basement, or garage, you’ll find practical advice to create a personalized workspace that supports your home improvement goals—and inspires your next project.
Step 1: Selecting the Right Space for Your Workshop
The first step in building your dream workshop is choosing the right location. Your available options will depend on your home’s layout, but here are the most common choices—and what to consider for each:
- Garage: Offers ample space, ventilation, and access for larger projects or materials. Downside: may compete with vehicle storage.
- Basement: Typically quiet and out-of-the-way, but you’ll need to address humidity, ventilation, and possibly egress requirements.
- Spare Room: Best for lightweight projects or crafts. Ensure good ventilation and protection for flooring and walls.
- Outdoor Shed: Offers isolation from living spaces and easy access to outdoor projects. Needs weatherproofing and security measures.
Key Considerations
- Access to electrical outlets and lighting
- Ventilation for dust and fumes
- Sound insulation if using loud power tools
- Proximity to main living areas (to minimize disruption)
- Security for your tools and equipment
Step 2: Planning Your Workshop Layout
A carefully planned layout boosts productivity, safety, and comfort. Start by measuring your space and sketching a rough floor plan. Consider the following:
Work Zones
- Main Workbench Area: Central hub for most projects. Needs good lighting and easy tool access.
- Tool Storage Zone: Keep frequently used tools within arm’s reach of the bench; store larger or less-used tools further away.
- Materials Storage: Shelves or racks for lumber, fasteners, and supplies. Store vertically to save floor space.
- Assembly/Sanding Area: If space allows, designate a separate spot to keep finished surfaces dust-free.
- Finishing Area: For painting, staining, or gluing, with good ventilation and protection for surrounding surfaces.
Layout Tips
- Allow at least 3 feet of clearance around your main workbench.
- Keep heavy, stationary equipment (like a table saw) against walls to maximize floor space.
- Arrange electrical cords safely to prevent tripping hazards.
- Install adequate overhead and task lighting.
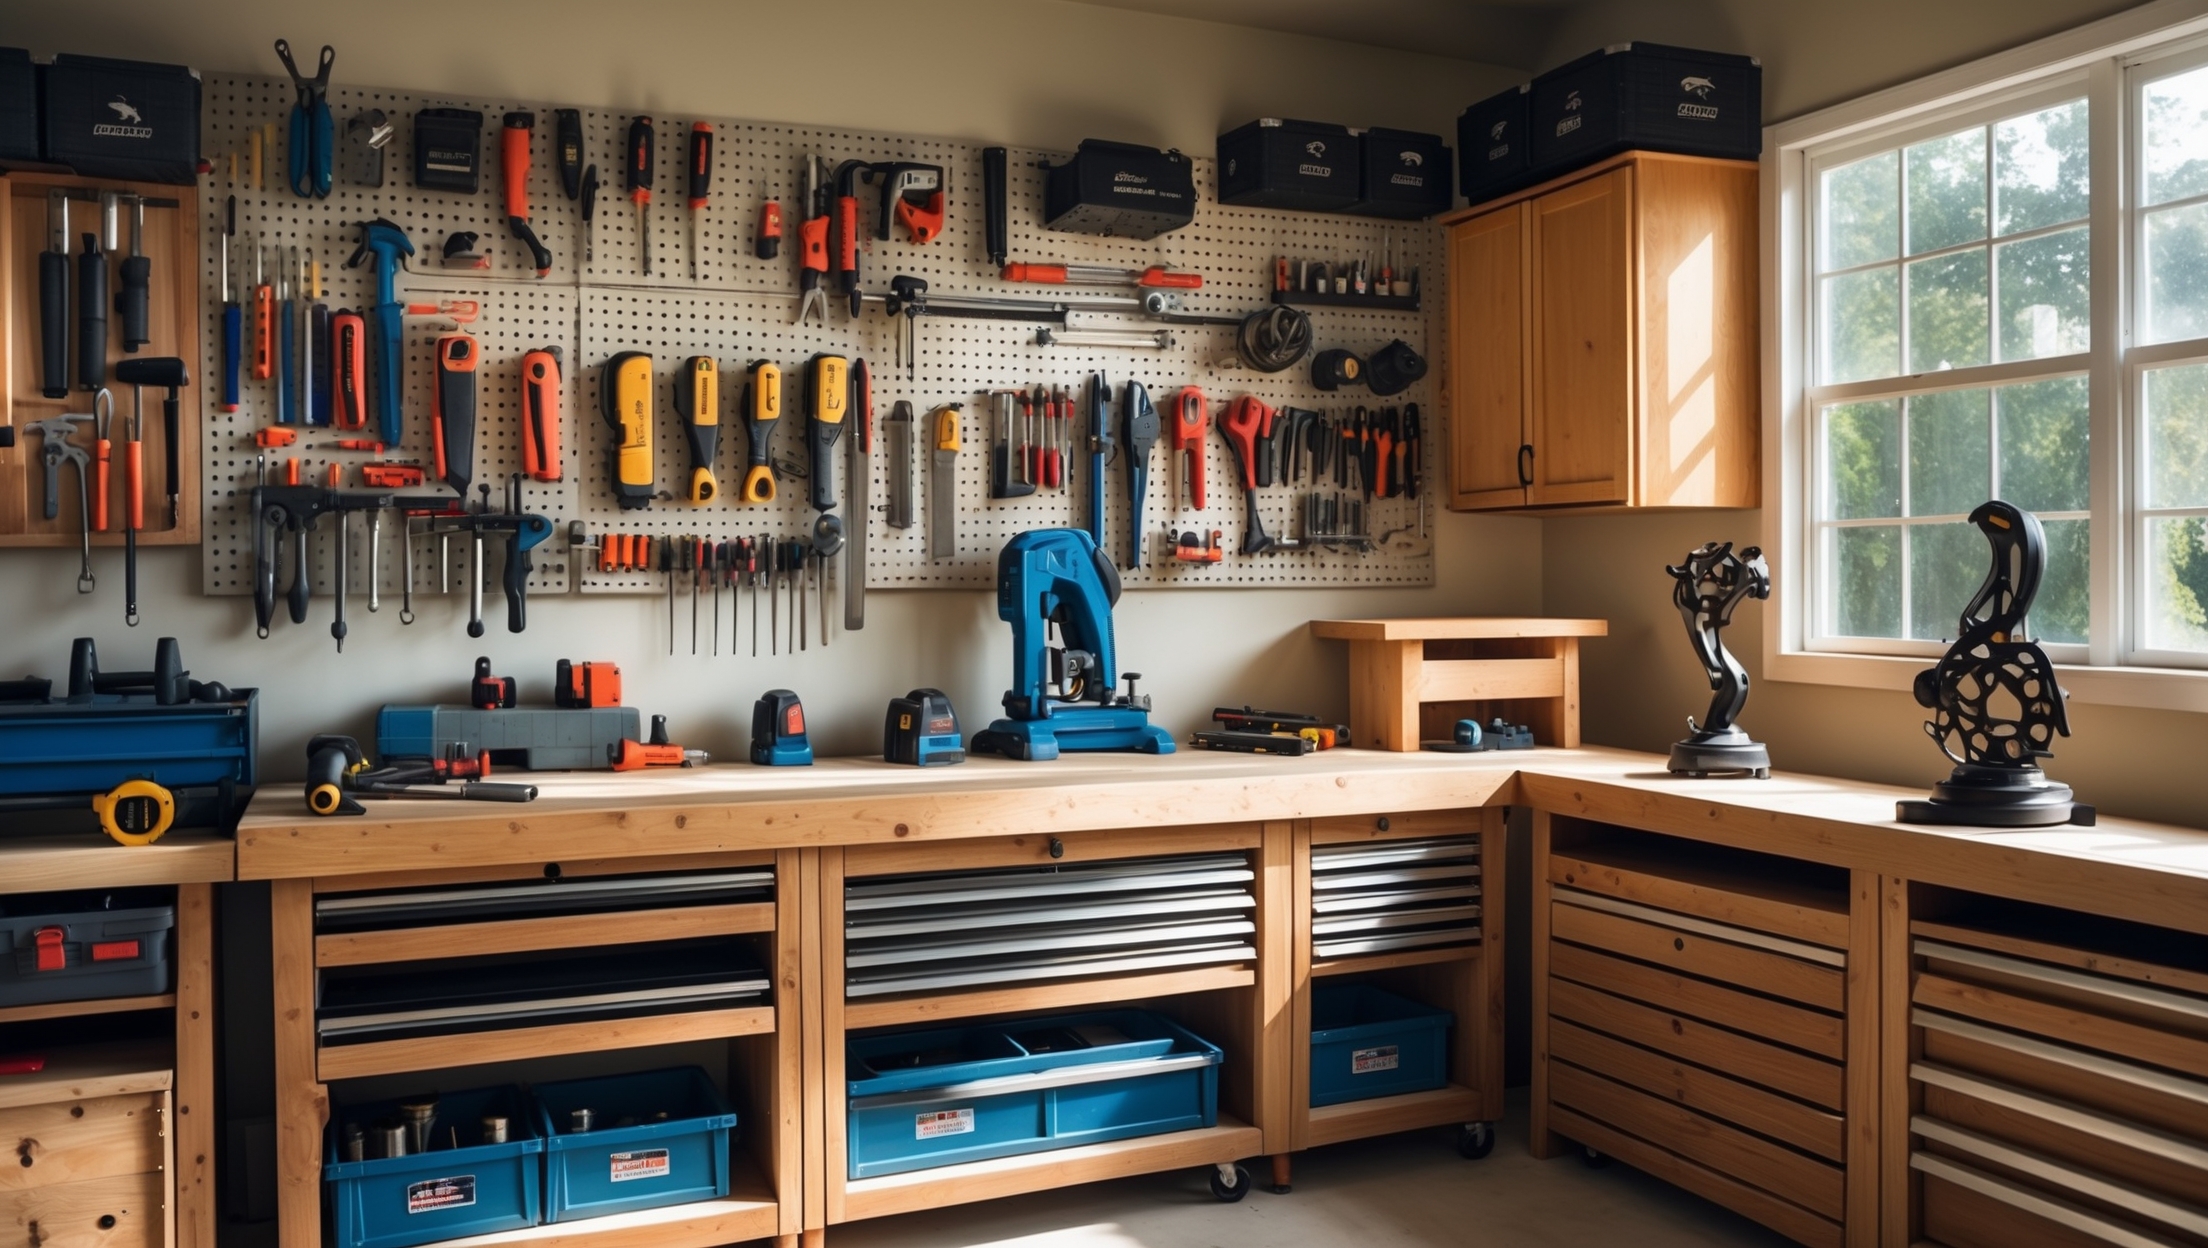
Step 3: Outfitting Your Workshop—Essential Tools and Equipment
Start with the basics and expand as your skills and project ambitions grow. Focus on quality for frequently used items; you can rent or borrow specialty tools as needed.
Basic Hand Tools
- Hammer (claw and mallet)
- Screwdriver set (flathead and Phillips)
- Adjustable wrench and pliers (needle-nose, slip-joint)
- Tape measure, square, and level
- Utility knife
- Chisels
Must-Have Power Tools
- Cordless drill/driver
- Circular saw
- Jigsaw
- Orbital sander
- Shop vacuum
Additional Equipment
- Workbench (sturdy, ideally with a vice)
- Pegboard or wall-mounted tool storage
- Extension cords and power strips (rated for workshop use)
- Clamps (variety of sizes)
- Step stool or portable ladder
Upgrades for Advanced DIYers
- Table saw or miter saw
- Router and router table
- Bench grinder
- Compressor and nail gun
- Dust collection system
Step 4: Workshop Safety—Must-Have Features and Habits
Safety is non-negotiable. A well-designed workshop minimizes risks and keeps you protected from common hazards like cuts, electrical shocks, and airborne particles.
Safety Equipment Checklist
- First-aid kit (stocked and accessible)
- Fire extinguisher (ABC-rated for all fire types)
- Safety goggles and ear protection
- Dust masks or respirators
- Gloves (cut-resistant and chemical-resistant)
- Anti-fatigue mat for standing comfort
- Non-slip flooring or mats
- Clear, well-marked emergency exit (especially for basements)
Best Safety Practices
- Unplug power tools before changing blades or bits.
- Keep pathways clear of clutter and cords.
- Store chemicals and solvents in sealed, labeled containers away from heat sources.
- Install a carbon monoxide detector if using gas-powered tools or heating.
- Regularly inspect tools and extension cords for wear or damage.
Step 5: Smart Storage Solutions for Tools and Materials
Effective storage makes your workshop safer and more efficient. Poorly stored tools become hazards and slow your progress. Invest time in organizing from the start—and adjust as your tool collection grows.
Tool Storage Ideas
- Pegboards: Hang hand tools for easy access and quick visual inventory.
- Drawer organizers: Keep fasteners, drill bits, and small tools sorted.
- Wall-mounted racks and shelves: Store power tools, buckets, and bins off the floor.
- Rolling tool chests: Great for mobility if you reconfigure your space often.
Material Storage Tips
- Use vertical racks for lumber and pipes to save floor space.
- Label all bins and shelves clearly.
- Store chemicals and paints in a ventilated, lockable cabinet.
- Keep fasteners and hardware in divided containers.
Step 6: Lighting and Electrical—Getting It Right
Good lighting and safe power supply are crucial for productivity and safety. Poor lighting leads to mistakes and accidents, while overloaded circuits pose fire risks.
Lighting Recommendations
- Install bright overhead LEDs for general illumination.
- Add adjustable task lighting above your workbench and in corners.
- Consider under-shelf LED strips for shadow-free work surfaces.
Electrical Safety Tips
- Use grounded, GFCI-protected outlets—especially in garages or basements.
- Avoid daisy-chaining extension cords or power strips.
- Ensure your home’s electrical panel can handle the extra workshop load; consult an electrician if unsure.
- Route cords away from work areas to prevent tripping.
Step 7: Ventilation and Dust Control
Air quality often gets overlooked in home workshops, but it’s vital for your health and comfort. Sawdust, fumes, and chemicals can accumulate quickly—especially in small, enclosed spaces.
Ventilation Strategies
- Install a window exhaust fan or through-wall vent for air exchange.
- Use portable fans to direct dust away from your work area.
- Consider a compact air purifier with a HEPA filter for fine particulates.
- Always work with garage doors or windows open when possible.
Dust Control Tools
- Attach shop vacuums to sanders, saws, and routers when possible.
- Sweep or vacuum floors after each session.
- Use a dedicated dust collection system for larger workshops.
Step 8: Workshop Compliance and Permit Considerations
Most simple home workshops don’t require permits, but certain upgrades or additions can trigger local building codes or HOA rules. Protect yourself by checking the following:
- Electrical upgrades (new circuits or panels) may need permits and inspection.
- Major structural changes (knocking down walls, adding windows) could require approval.
- Outdoor sheds over a certain size may need permits or must meet zoning setbacks.
- Check HOA rules for exterior changes or visible sheds.
- Properly store and dispose of hazardous materials per local regulations.
Consult your local building department or a licensed contractor if in doubt. It’s always better to ask first than undo noncompliant work later.
Step 9: Personalizing Your Workshop—Comfort and Inspiration
Your workshop should be a place you enjoy spending time in. Add features that boost comfort and creativity:
- Mount a small Bluetooth speaker or radio for music or podcasts.
- Add a mini fridge or coffee maker for long project days.
- Decorate with project photos, blueprints, or vintage tool signs.
- Use color-coded bins or tool handles for quick identification.
- Install a small whiteboard or corkboard for project notes and reminders.
Even a few personal touches make your workshop more inviting and help fuel your DIY motivation.
Step 10: Maintenance Best Practices—Keeping Your Workshop in Top Shape
Maintaining your workspace and tools ensures a safe, efficient, and enjoyable DIY experience. Develop habits that prevent clutter and damage:
- Return tools to their storage spots after each session.
- Wipe down benches and sweep floors regularly.
- Sharpen blades and drill bits as needed; replace worn parts promptly.
- Check for water leaks, rust, or pest issues in garages and basements.
- Test safety equipment (fire extinguisher, alarms) every six months.
- Review and update your tool collection—donate or sell duplicates.
Conclusion: Start Building Your Dream Workshop Today
Setting up a home workshop is one of the most rewarding upgrades you can make as a homeowner and DIY enthusiast. Rather than a daunting expense or a chaotic afterthought, your workshop can be a thoughtfully organized, safe, and inspiring space that grows with your skills. Start with a clear layout and the essential tools you’ll use most. Pay attention to lighting, ventilation, and storage to keep your workspace comfortable and efficient. Don’t overlook safety, compliance, and simple maintenance routines—these habits protect your investment and your well-being. Most importantly, make the space your own. Whether you’re building furniture, tackling home repairs, or crafting with your kids, a purpose-built workshop makes every project smoother and more enjoyable. With a little planning and these practical steps, you’ll be ready to take on any home improvement challenge that comes your way—right from the comfort of your own home. Now, roll up your sleeves and let the building begin!